Macro test of F&V K160 24 LED video lights

_1040698

I’ve been looking for some small but powerful LED lighting units for a while, insect-friendly cold lights to replace my old Schott fibre optic unit. Last week I was fortunate to find some F&V K160 24 LED video lights (  also sold under the Metz label as the LED 160 Mecalight ) on sale for a third of the normal selling price of around £40, so I bought 3 of them. I also bought a couple of Phot-R mini light stands and several sets of 1100 mA AAA rechargeable batteries.

_1040718

_1040731


_1040724

The K160’s each take 2 AAA batteries, which will power the lights for around 30 minutes before starting to dim. I’m using 1.2 volt rechargeables but 1.5 volt alkaline batteries will probably give a little extra filming time. I’m impressed at how powerful the lights are for such a small unit, and the size means they can be brought very close to an invertebrate subject without causing any heat stress. For more information on the F&V K series of LED lights go to http://www.fvlighting.com/store/lighting/led/kseries.html .

Here is some test footage of Swallowtail butterfly caterpillars, filmed on my Panasonic GH3, using 2 K160’s.

<a

Black Country Wild – nature & wild places in the West Midlands

Birmingham has over 14 square miles of public open space, more than any other European city, as well as numerous local and Wildlife Trust nature reserves and one National Nature Reserve, Sutton Park. Black Country Wild is a personal project to bring the nature and wild places of the region to a wider audience.

Here is a compilation of HD video I’ve filmed this month at Moseley Pool, Swanshurst Park in Birmingham, showing young mute swans, Canada geese, and coots experiencing their first days on the water.

<a

Powering a Tascam DR-60D digital field recorder with a Mi 10400mAh Powerbank

I use my Panasonic Lumix GH3 camera mostly for wildlife and macro filming and on the occasions I need to record live sound in the field, a Rode VideoMic on the hotshoe ( with a Rode Deadcat from my NTG1 microphone to reduce wind noise ) is a good lightweight solution.

Last year I started using the GH3 to shoot web commercials but found I needed more audio control when recording interviews. Also, I needed 48 volt phantom XLR power for my NTG1. The Tascam DR-60D portable PCM recorder had been available for a few months and had good reviews so I decided to get one.
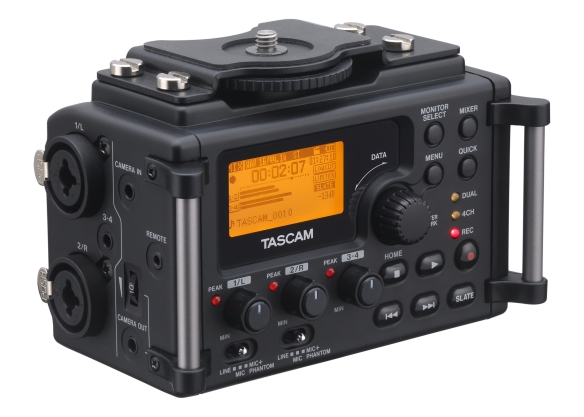
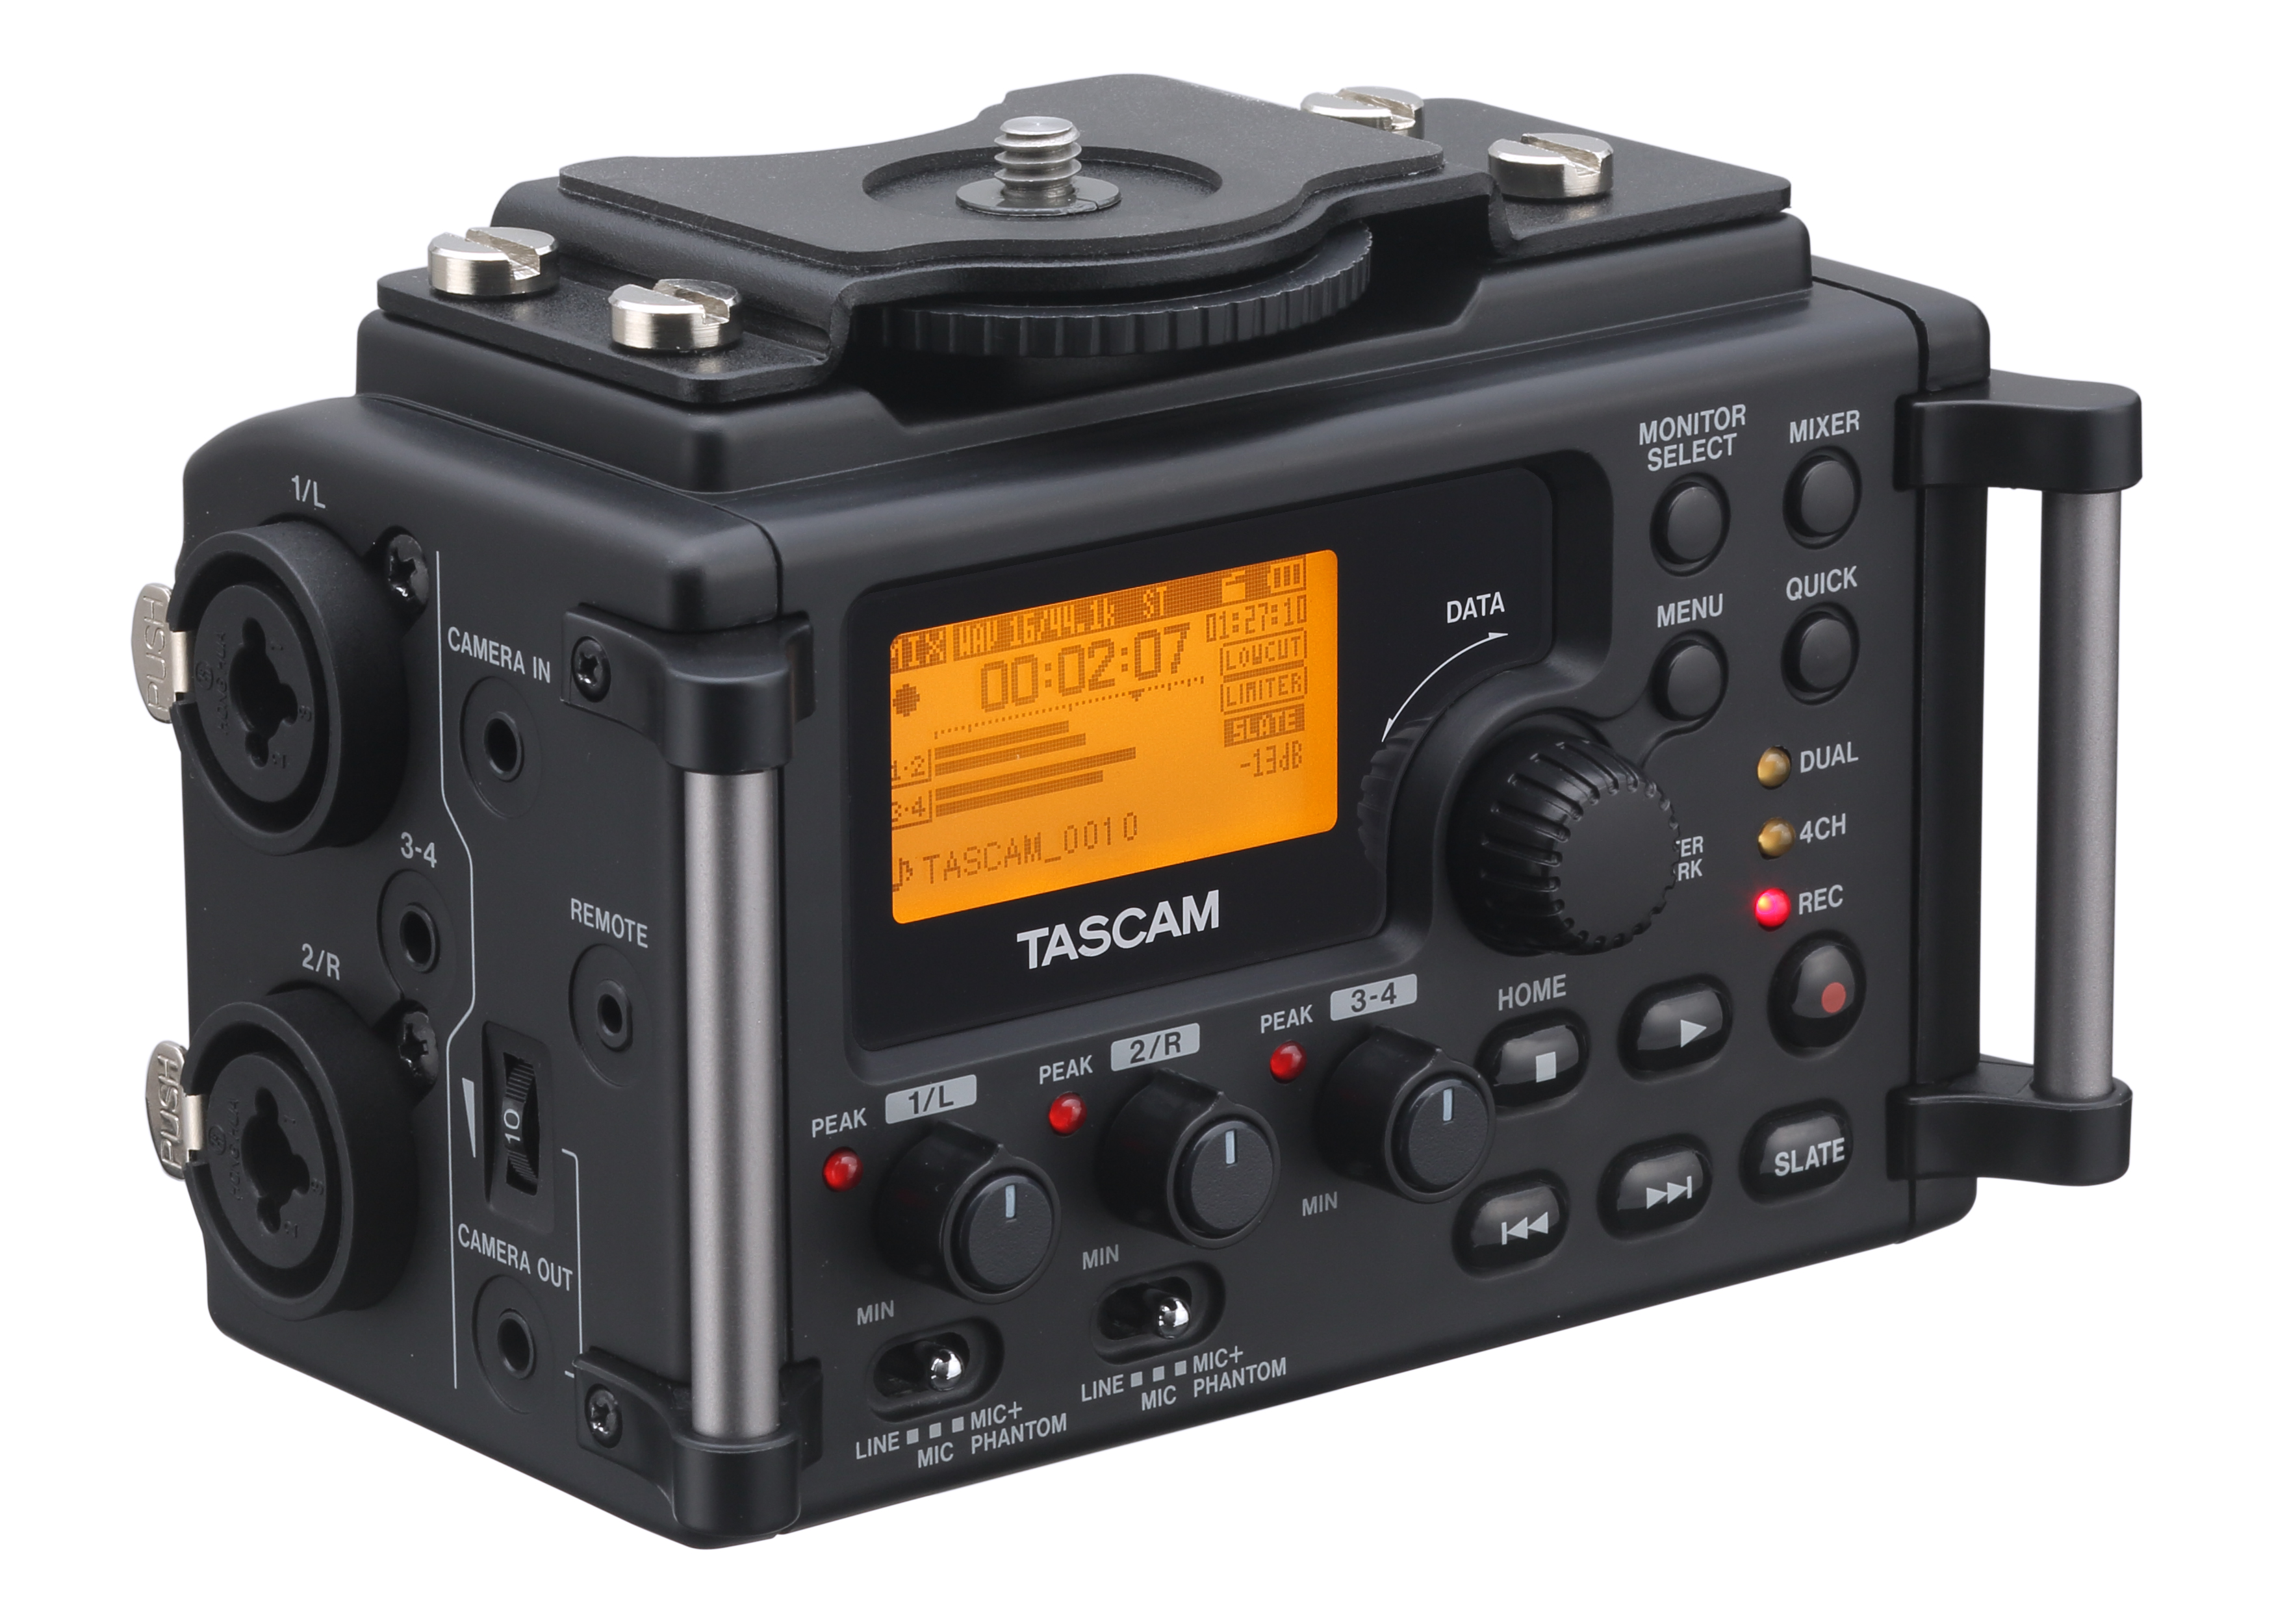
Tascam DR-60D

Tascam DR-60D

Many reviews had criticised the poor battery life of the Tascam ( the DR-60D uses 4 AA sized 1.5v alkaline or 1.2v NiMh cells ) and in the field I found I struggled to get 30 minutes recording time from alkaline batteries. I also had the additional problem ( not reported in any reviews ) of newly charged NiMh batteries causing the Tascam to crash a few seconds after being switched on. It took several switch-on attempts over a 10 or 15 minute period before the display would finally lock on.

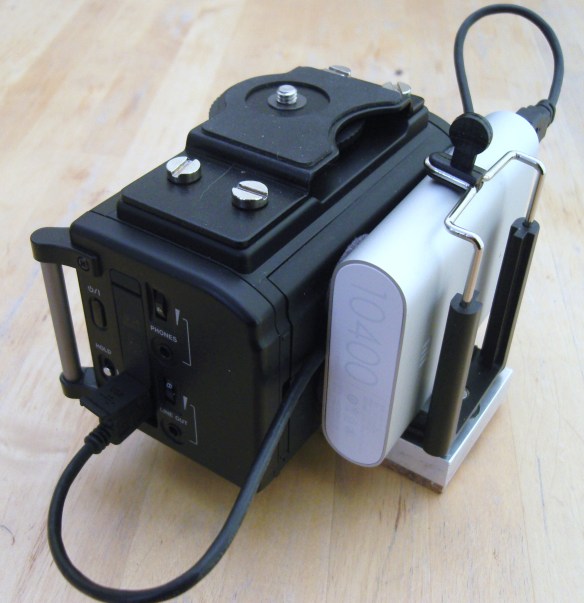
The DR-60D can also be powered via a 5 volt mini USB port, and many owners have gone down this route, buying a portable Powerbank phone / tablet charger as the main power source.

It obviously adds additional bulk and weight to the Tascam but is worth it for the extended recording time. I looked at numerous Powerbanks, rejecting those that looked underpowered, flimsy or had an unwanted built in torch, and chose a Mi 10400 mAh model, with a tough aluminium housing and reliable LG or Samsung Li-ion cells.  http://www.mi.com/en/mipowerbank10400/  . The Mi is also available in 5000 mAh and 16000 mAh versions. My 10400 mAh version cost £19.99 from a UK Ebay seller.

Be wary of fake versions though – yes, Chinese made fakes of a genuine Chinese product. This link shows how to tell the difference between a fake and the real thing http://www.techmesto.com/identify-fake-xiaomi-power-bank/ .

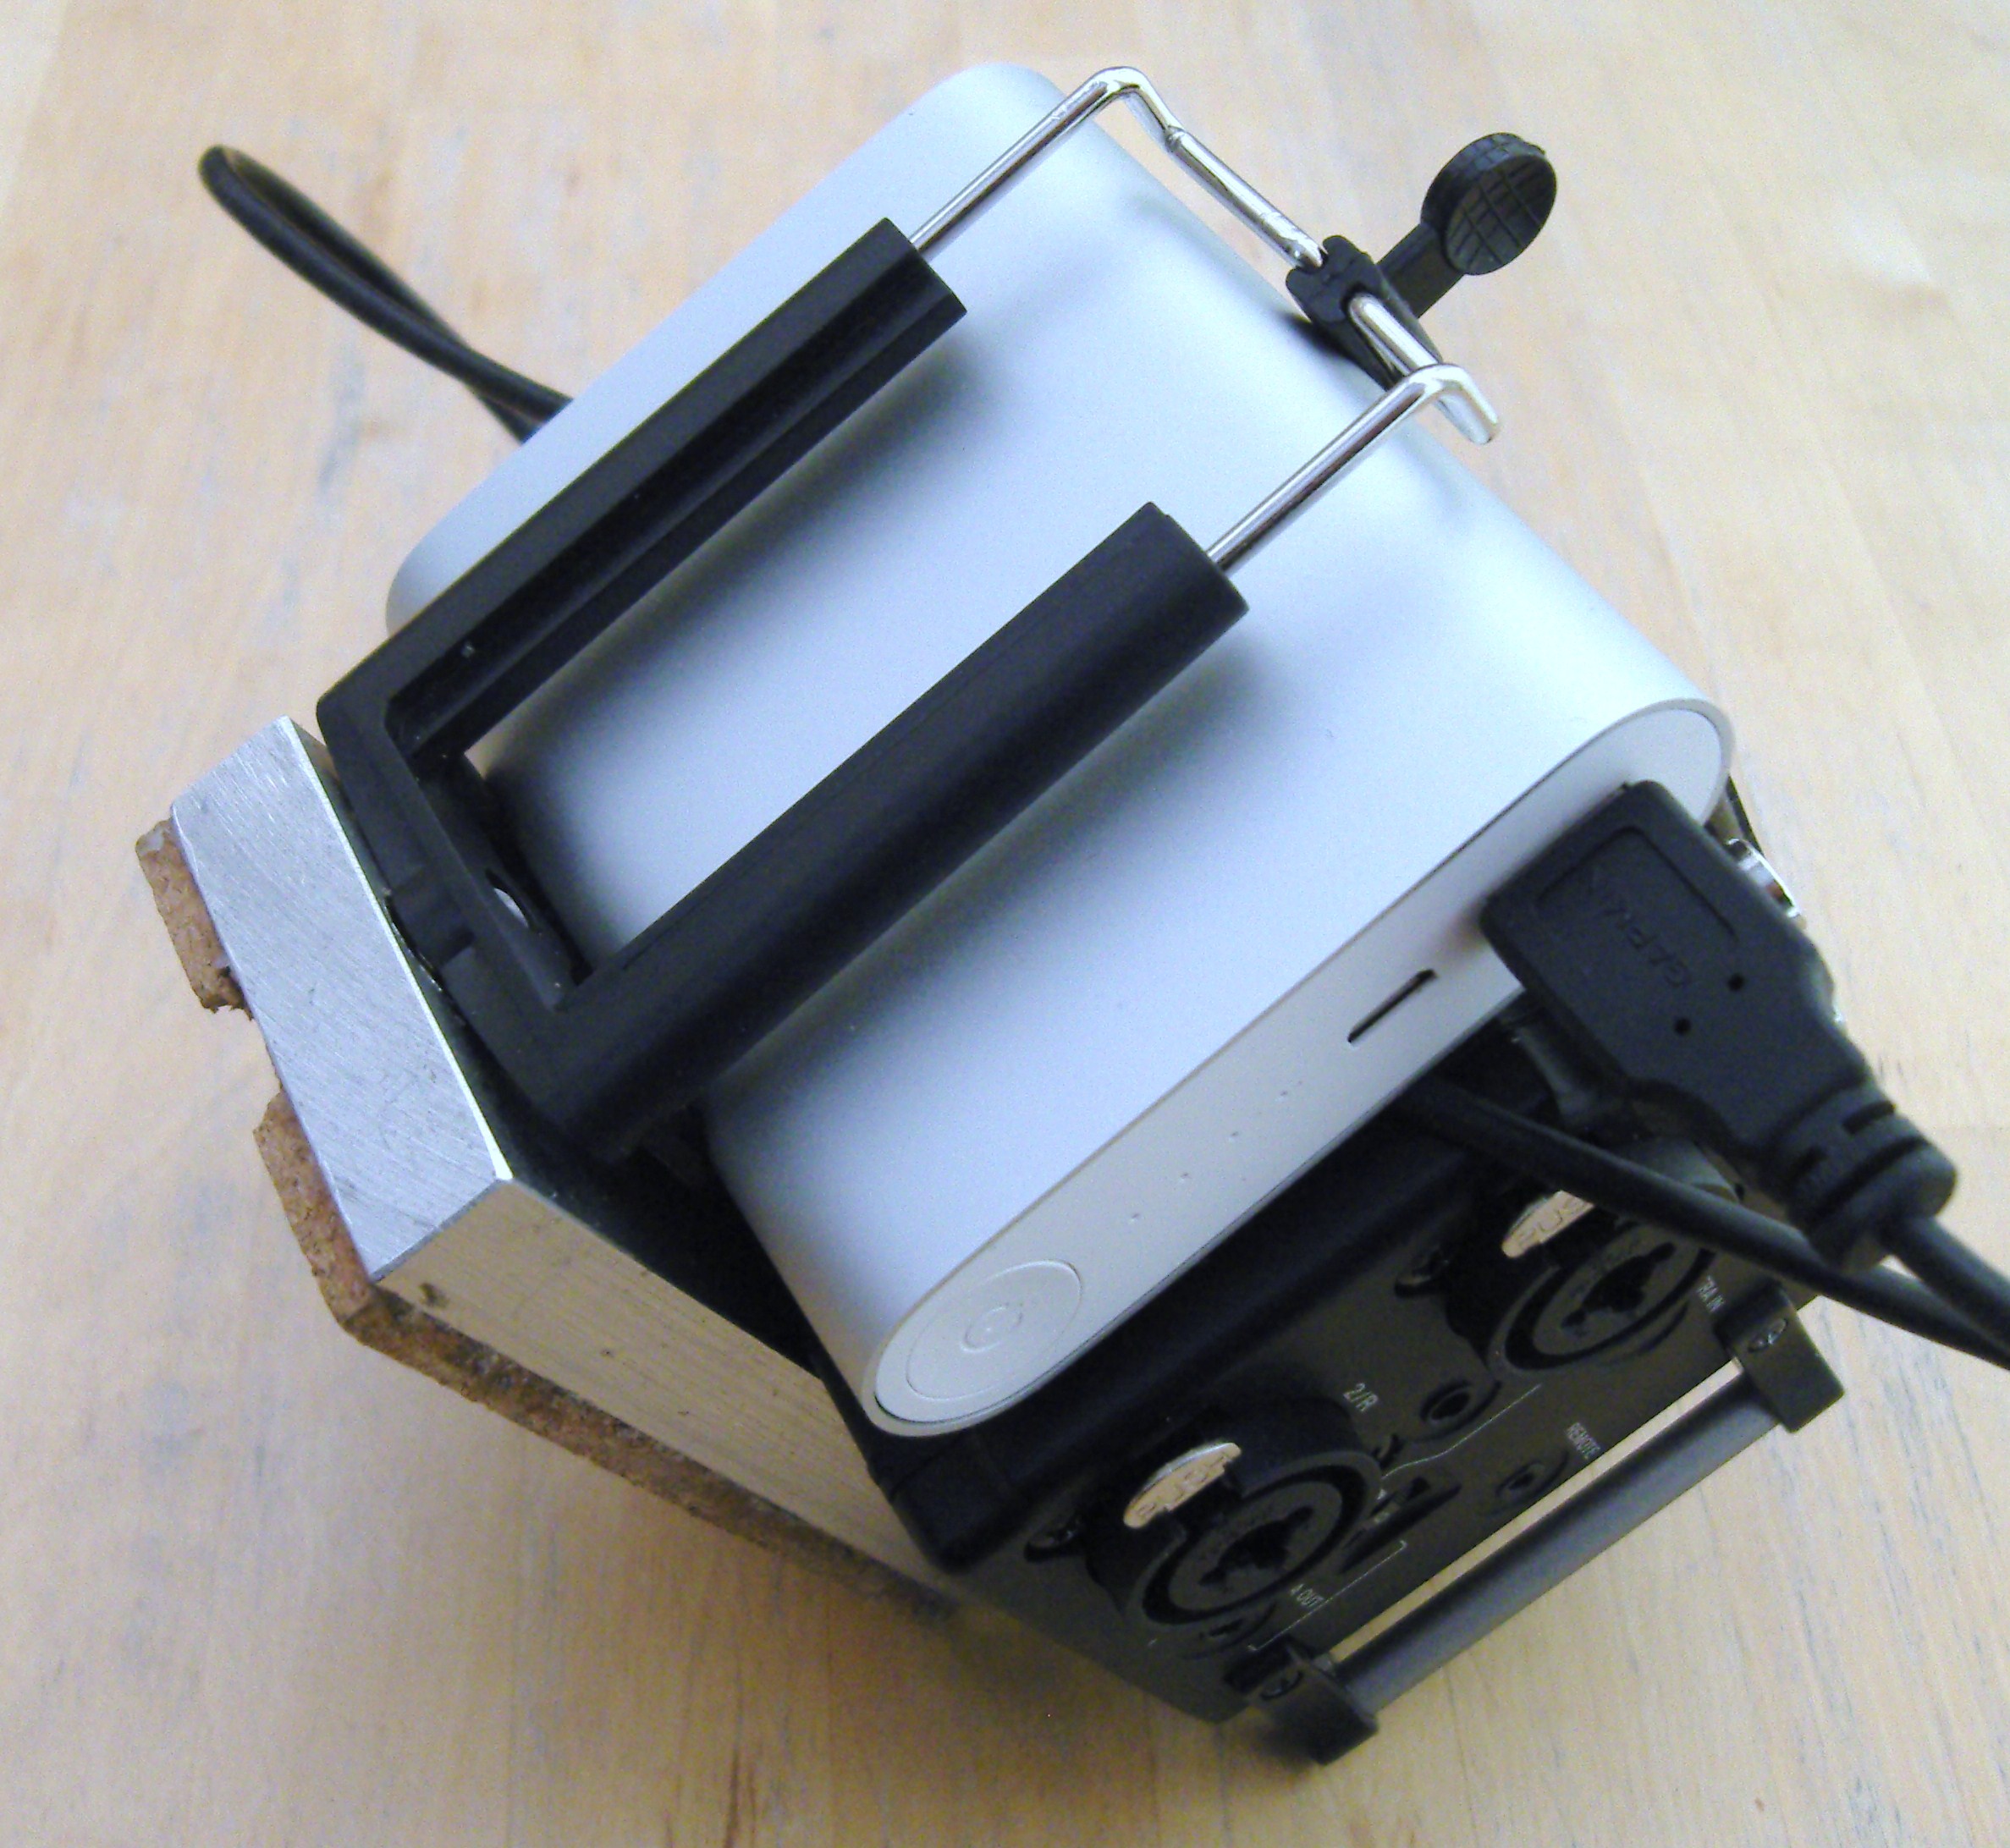
I’ve mounted the Mi to the Tascam using an aluminium block ( self drilled and 1/4″ threaded ) and a smartphone tripod support, both, like the Mi itself, bought on Ebay.

SAMSUNG DIGITAL CAMERA SAMSUNG DIGITAL CAMERA SAMSUNG DIGITAL CAMERA

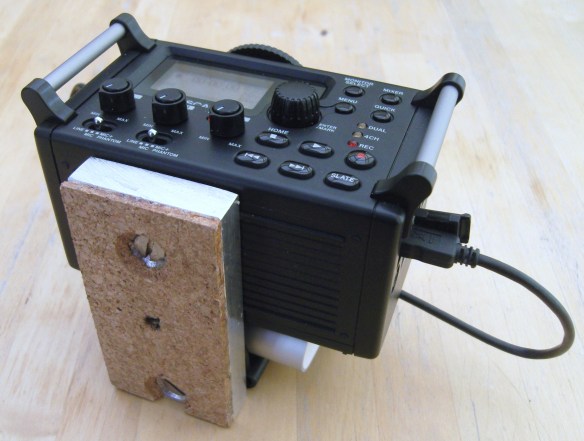
I haven’t done a conclusive battery life test but after recording with the Tascam, with 48volt phantom power switched on continuously for 6 hours, the Mi Powerbank was still showing 3 of its 4 power remaining lights.

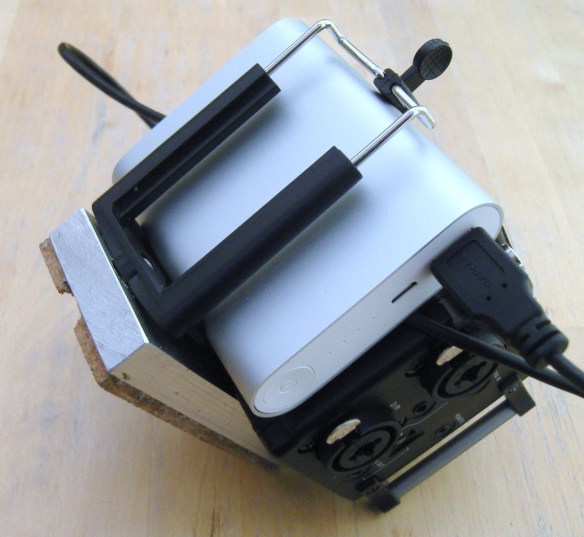
The Mi is recharged via a micro USB port. A short USB to micro USB charging cable is supplied but it doesn’t come with a 5 volt USB charger. A 2 amp unit is recommended, which will charge the Mi in about 8 hours. For output to the Tascam you’ll need a USB to mini USB cable. Remaining charge can be tested by pressing the button on the side of Mi – the LEDs will flash for 10 seconds.

When plugged in to the Tascam, even when the DR-60D is switched off, the LED lights on the Mi will illuminate, giving a constant indication of the power level.

I don’t have any information as to whether the newer Tascam DR-60D mkii and DR-70D models have a better battery life but for the DR-60D I happily recommend the Mi Li-ion Powerbank.

Repairing a wobbly Panasonic GH3 monitor screen

The early release Panasonic Lumix GH3 MFT cameras had two reported problems that developed over time, both caused by screws working loose. In an earlier blog entry I wrote about getting a loose GH3 hotshoe repaired last year. Recently the second fault appeared on my camera, and the LCD monitor screen developed an obvious wobble. I’d looked online at the GH3 service manual and knew that the wobble was caused by the LCD hinge screws becoming untightened. Unlike the hotshoe screws, these weren’t going to eventually drop into the camera body and cause damage to my GH3 but the floppy monitor was very annoying. As the warranty on the GH3 was well expired, and I consider myself a competent screwdriver handler, I did consider doing a repair myself. But the exploded diagram in the service manual didn’t inspire me with confidence that I was going to be able to put all the bits back together again.

A big Thankyou then to David Thorpe, who also had this problem with his GH3 and has uploaded a very easy to follow repair tutorial on YouTube. I took the bull by the horns, or rather the jeweller’s screwdriver by the hand, yesterday and am now once again the owner of a wobble-free GH3. A dab of Loctite on the tightened screws has hopefully ensured it will stay that way.

David’s video can be viewed here:

Deep Focus Macro Lens System demonstration on Vimeo. Shot on Panasonic Lumix GH3.

I’ve been adjusting my Macroscope deep focus lens system for use on MFT ( Micro Four Thirds ) size sensors and have just uploaded some demonstration footage to Vimeo. The video features Tegenaria house spiders, garden orb web spider, bumble bees, oak bush cricket, and myself in the background – to demonstrate what is effectively a combination wide angle & macro lens. The lens on the front of the system is a Cosmicar ( Pentax ) 8.5mm f1.5 C-mount lens, but any C or CS mount lens can be fitted. The smaller lenses are great for getting in to places – like inside flower heads – where a conventional macro lens can’t go, and the system allows focussing down to the front element of the lens.

The Macroscope has been developed by trial and error over many years for use in my professional wildlife work and I don’t give away details of how to build one. It is available for rental, with myself as camera operator.

<a

Garden orb spiders web building & feeding, shot on the Panasonic GH3

A montage of Garden Cross / Garden Orb spiders from my garden in Birmingham, building their webs and feeding. The spiders, ranging in size from 3mm spiderlings to 15mm adults, were collected and placed on a set with standing grass stems that I predicted would be in a suitable arrangement to encourage web building. Shot on my Panasonic Lumix GH3 at All-Intra 72mbs and a Sigma EX 105mm macro lens.

<a

Shooting with the Panasonic Lumix GH3 at Birmingham’s Frankfurt Christmas Market

This week I took a wander around Birmingham City Centre to shoot some GH3 footage at the German Christmas Market in Victoria Square and New Street, and also the Ferris Wheel and outdoor skating rink in Centenary Square.
As usual I filmed in 1080p All-Intra 72Mbs, with a few time-lapse shots using the camera’s x8 Miniature Effect and a couple of slo-mo sequences at -40% IPB. ISO was switched between 400 and 800. I used just one lens, my Four-Thirds Mk1 Olympus Zuiko 14-54mm f2.8/3.5 + DMW-MA1 mount adapter.